Investing in a deionized (DI) water system is a huge step toward getting a flawless, spot-free rinse every time you wash your car. But here’s the catch: your DI water can’t fix scratches, swirl marks, or paint damage caused by poor washing habits.
Many car enthusiasts think that if they have pure water, their car will always look perfect. But water is only part of the equation — technique and tools matter just as much. Learning how to wash a car properly helps you protect your paint job for the long run and gets you that deep, glossy shine you love.
Below, you’ll find the most common car washing mistakes that your DI system can’t fix, plus practical car wash tips to make sure you get professional results at home.
1. Using the Wrong Soap
The Mistake:
You’d be surprised how many DIY detailers reach for dish soap when washing their car. While dish soap works wonders on greasy pans, it’s harsh on your car’s finish. It strips away wax, sealant, and even light ceramic coatings, leaving your paint unprotected and dull.
The Fix:
Use a soap specifically formulated for automotive paint. A good car shampoo lifts dirt and grime safely without harming your protective layers.

What Type of Soap Is Right for Me?
Choosing the right car wash soap can make a huge difference:
pH-Balanced Car Wash Soap: Most quality car wash shampoos are pH-neutral, meaning they won’t strip wax or sealants. They’re gentle yet effective for routine washes.
Wax-Infused or Ceramic-Boost Soaps: Some car shampoos add a light layer of wax or ceramic protection while you wash. These can help maintain your vehicle’s shine between more thorough wax or ceramic coating applications.
High Sudsing Formula: Look for soaps that create rich, foamy suds. The more suds, the better the lubrication between your wash mitt and the paint — which means fewer swirl marks.
Never use household cleaners like dish soap or laundry detergent — they’re too harsh for delicate automotive finishes. Always read the label and buy from trusted car care brands.
2. Using Dirty or Worn-Out Wash Mitts
The Mistake:
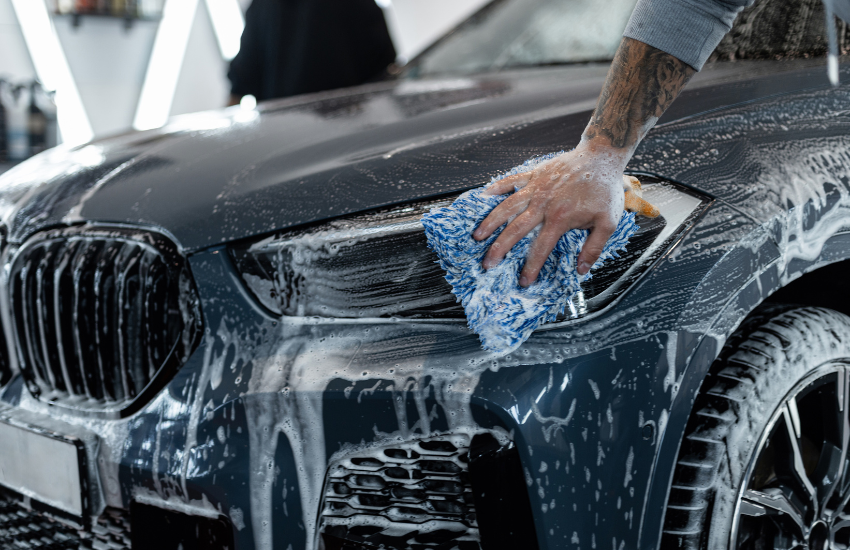
Old sponges, stiff bristles, or cheap wash mitts trap dirt and debris. When you drag them across your car’s surface, you’re essentially rubbing grit into the clear coat, which leaves fine scratches or swirl marks.
The Fix:
Invest in high-quality, plush microfiber or lambswool wash mitts. Always rinse your mitt thoroughly while washing and after each use.
What to Look for in Quality Wash Mitts
When shopping for wash mitts, keep these tips in mind:
- Material Matters: Microfiber or genuine lambswool mitts are soft, hold lots of suds, and lift dirt away from the paint instead of smearing it around.
- Durability: Look for mitts that hold their shape and softness after multiple washes. Avoid mitts that shed fibers or become matted after one season.
- Easy to Rinse: A good mitt should release dirt easily when rinsed in your rinse bucket — less risk of dragging particles across your paint.
- Fit and Comfort: Some mitts are glove-style with an elastic cuff to stay snug on your hand. Others are large pads — pick whatever feels most comfortable for you.
Never drop your mitt on the ground. If you do, rinse it thoroughly before using it again to prevent trapped grit from scratching your paint.
3. Skipping the Two-Bucket Method
The Mistake:
Using just one bucket to wash your entire car means you’re dipping your mitt back into a dirty soap solution. This reintroduces grit to your mitt and increases your chance of scratching the paint.
The Fix:
Use the classic two-bucket wash method to keep your wash mitt as clean as possible while you work.
Grit Guard Explained
A grit guard is a plastic insert that sits at the bottom of your rinse bucket. It’s designed with a grid that traps dirt and debris below the guard.
When you swirl your mitt against it, the guard dislodges grit and keeps it from floating back up into your clean rinse water.
How to Use It:
- Bucket One (Soap Bucket): Fill this with fresh car wash soap and clean water.
- Bucket Two (Rinse Bucket): Fill with plain water and insert a grit guard at the bottom.
- Wash: Dunk your mitt in the soap bucket, wash a section of the car, then rinse your mitt in the rinse bucket, scrubbing it gently against the grit guard. Repeat as you move around the car.
This simple step drastically reduces the risk of swirl marks.
4. Washing in Circular Motions
The Mistake:
It’s easy to instinctively scrub in circles, but circular washing can create swirl marks that catch light and make your paint look dull.
The Fix:
Wash in straight, overlapping lines — ideally front to back, top to bottom. This minimizes the chance of swirl patterns forming.
Why Swirl Marks Appear
Swirl marks, also known as micro-marring, are tiny scratches that show up under direct sunlight. They’re caused by abrasive particles dragging across the paint — often due to improper washing or drying techniques.
Common culprits:
- Dirty mitts or towels
- Skipping the two-bucket method
- Using brushes with stiff bristles
- Washing in circles or using too much pressure
Even with a DI water system that prevents mineral spots, poor technique will still leave your paint covered in these fine scratches. That’s why proper wash methods matter just as much as your spotless rinse.

Washing From Top to Bottom
The Mistake:
There’s an art to the order you wash your car. If you wash the dirty lower panels first, you risk picking up heavy road grime on your mitt and dragging it across cleaner, more delicate surfaces like your hood or roof.
The Fix:
Always wash from top to bottom:
- Roof and upper panels first — they’re usually the cleanest.
- Midsections like windows and doors next.
- Bumpers, rocker panels, and lower body last — they collect the most dirt and road grime.
Pro Tip: Use separate mitts or towels for your wheels and tires. Brake dust is extremely abrasive and should never touch your paint.
Spot-Free Rinse + Solid Technique = Perfect Results
A deionized water system is an amazing upgrade for any car enthusiast who wants a spotless, streak-free finish. But remember: clean, pure water can’t undo swirl marks, scratches, or damage caused by poor washing habits.
By using the right soap, a clean wash mitt, the two-bucket method with a grit guard, and washing in straight lines, you’re protecting your paint’s finish for the long run — and making your DI system work even harder for you.
Keep Your Shine, Keep It Spotless
You’ve already taken the step to eliminate water spots — now combine that spotless rinse with pro-level washing habits. It’s the secret to a swirl-free, showroom shine every time you wash.



Leave a comment
This site is protected by hCaptcha and the hCaptcha Privacy Policy and Terms of Service apply.